Follow Me On Social Media!

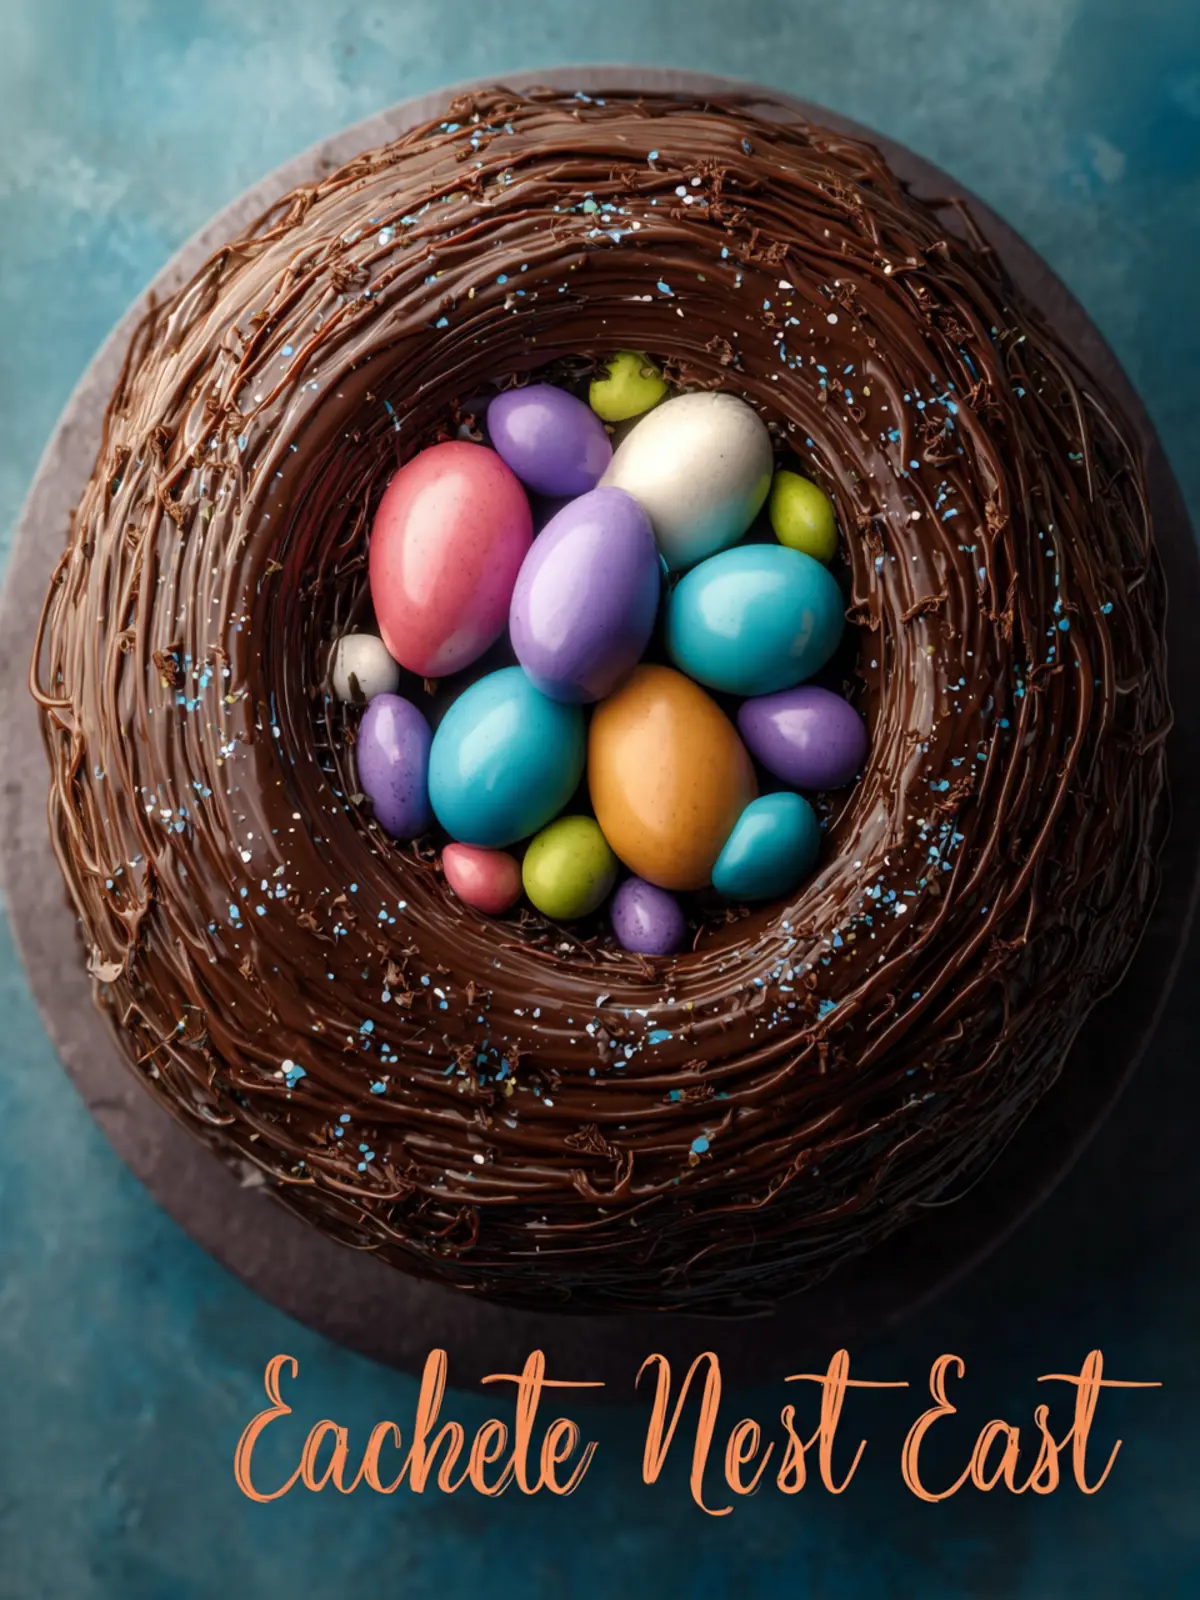
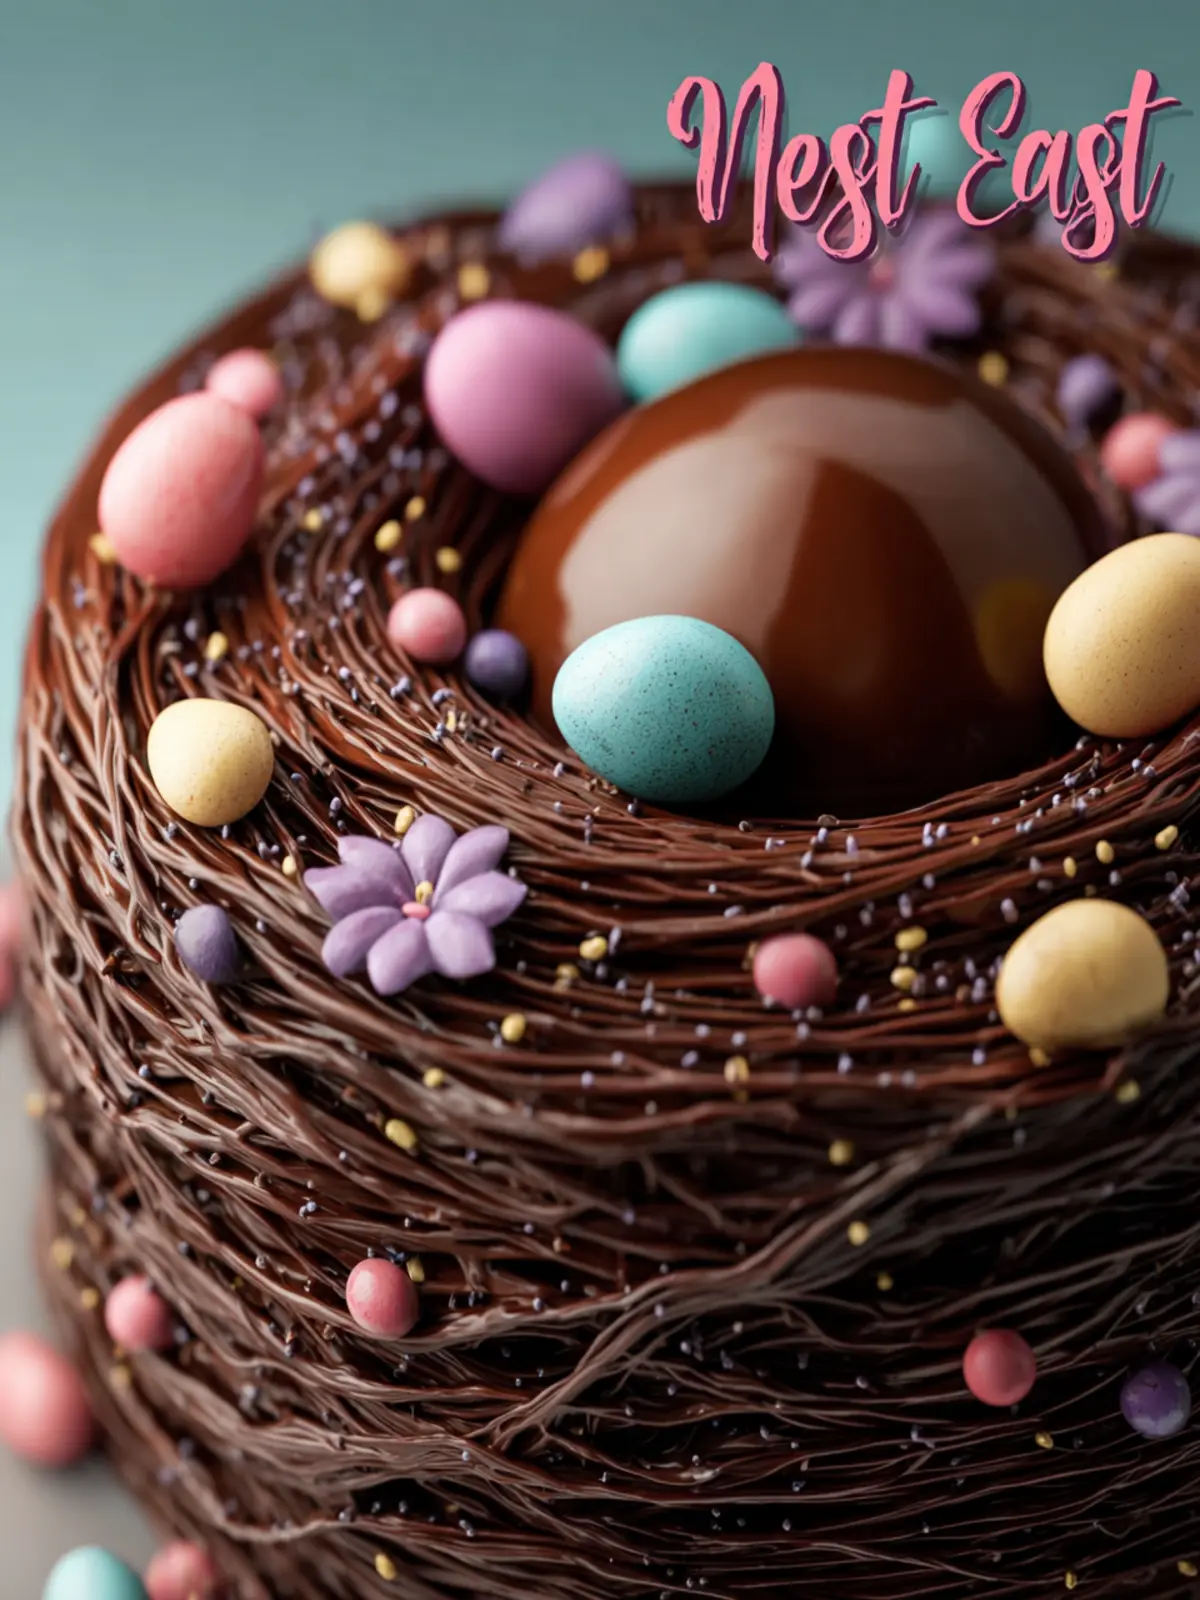
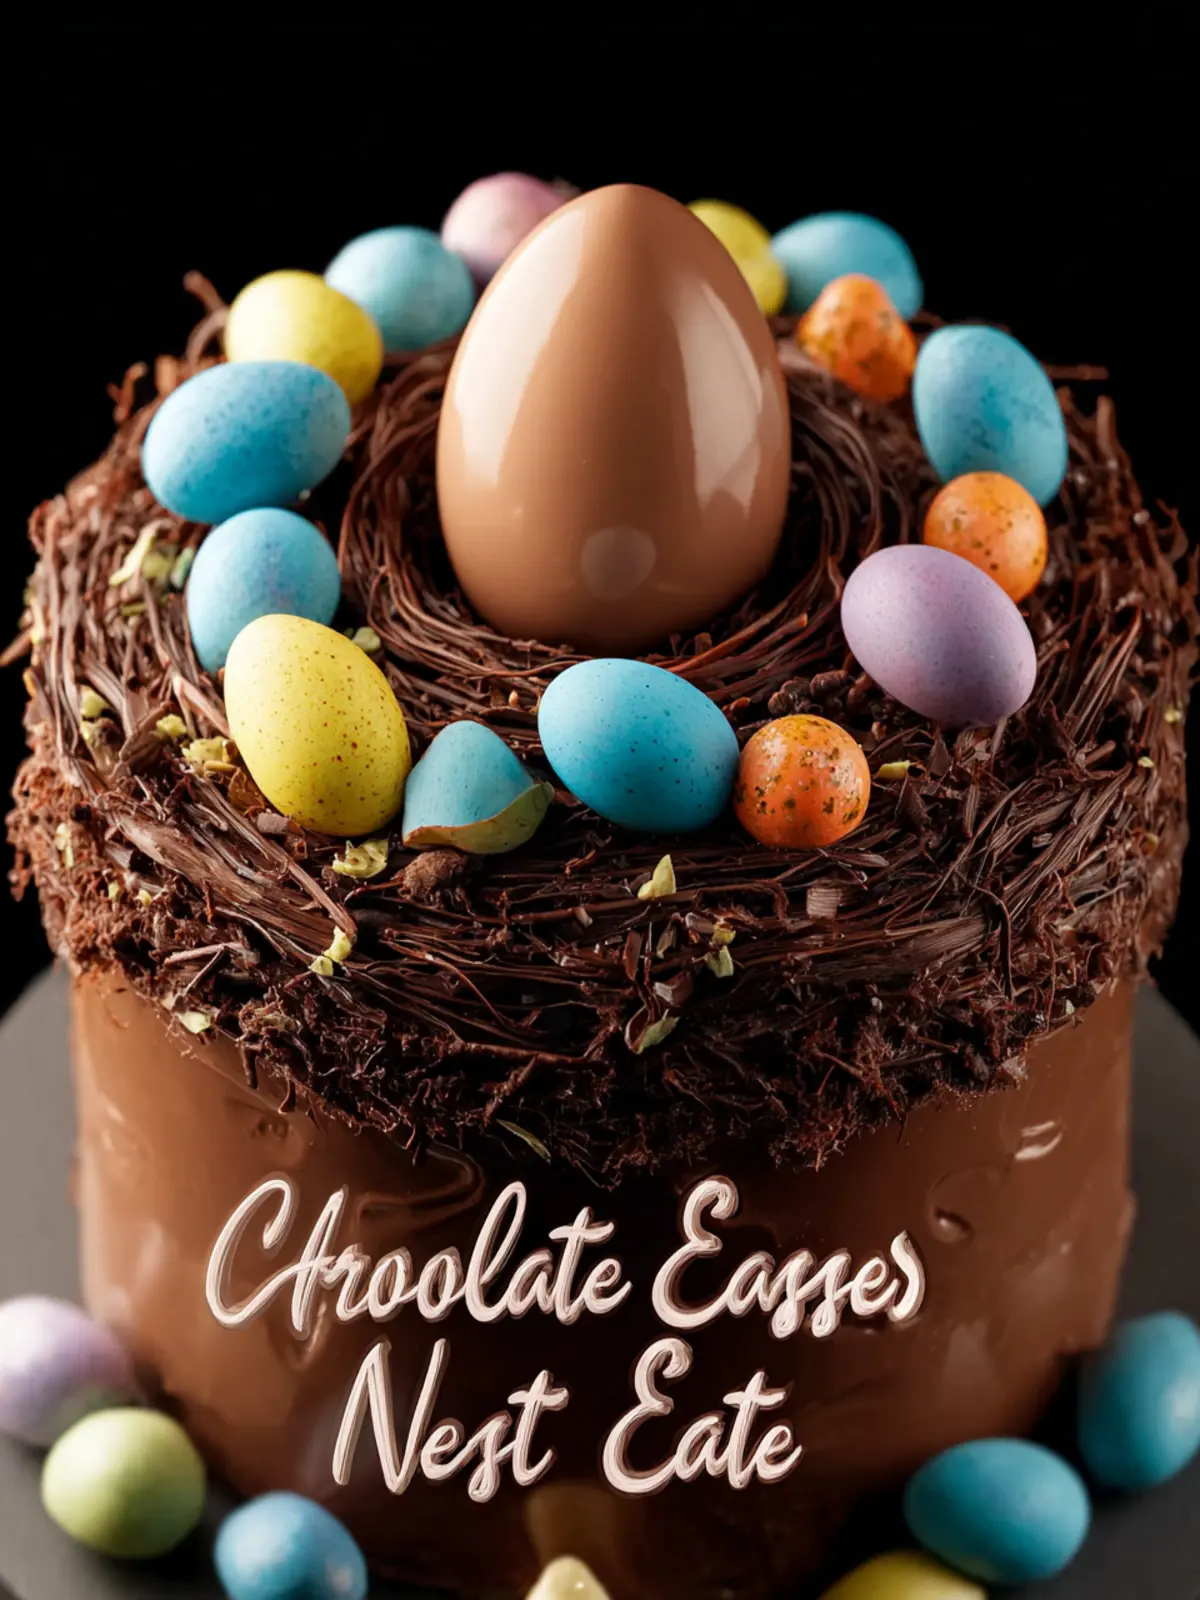
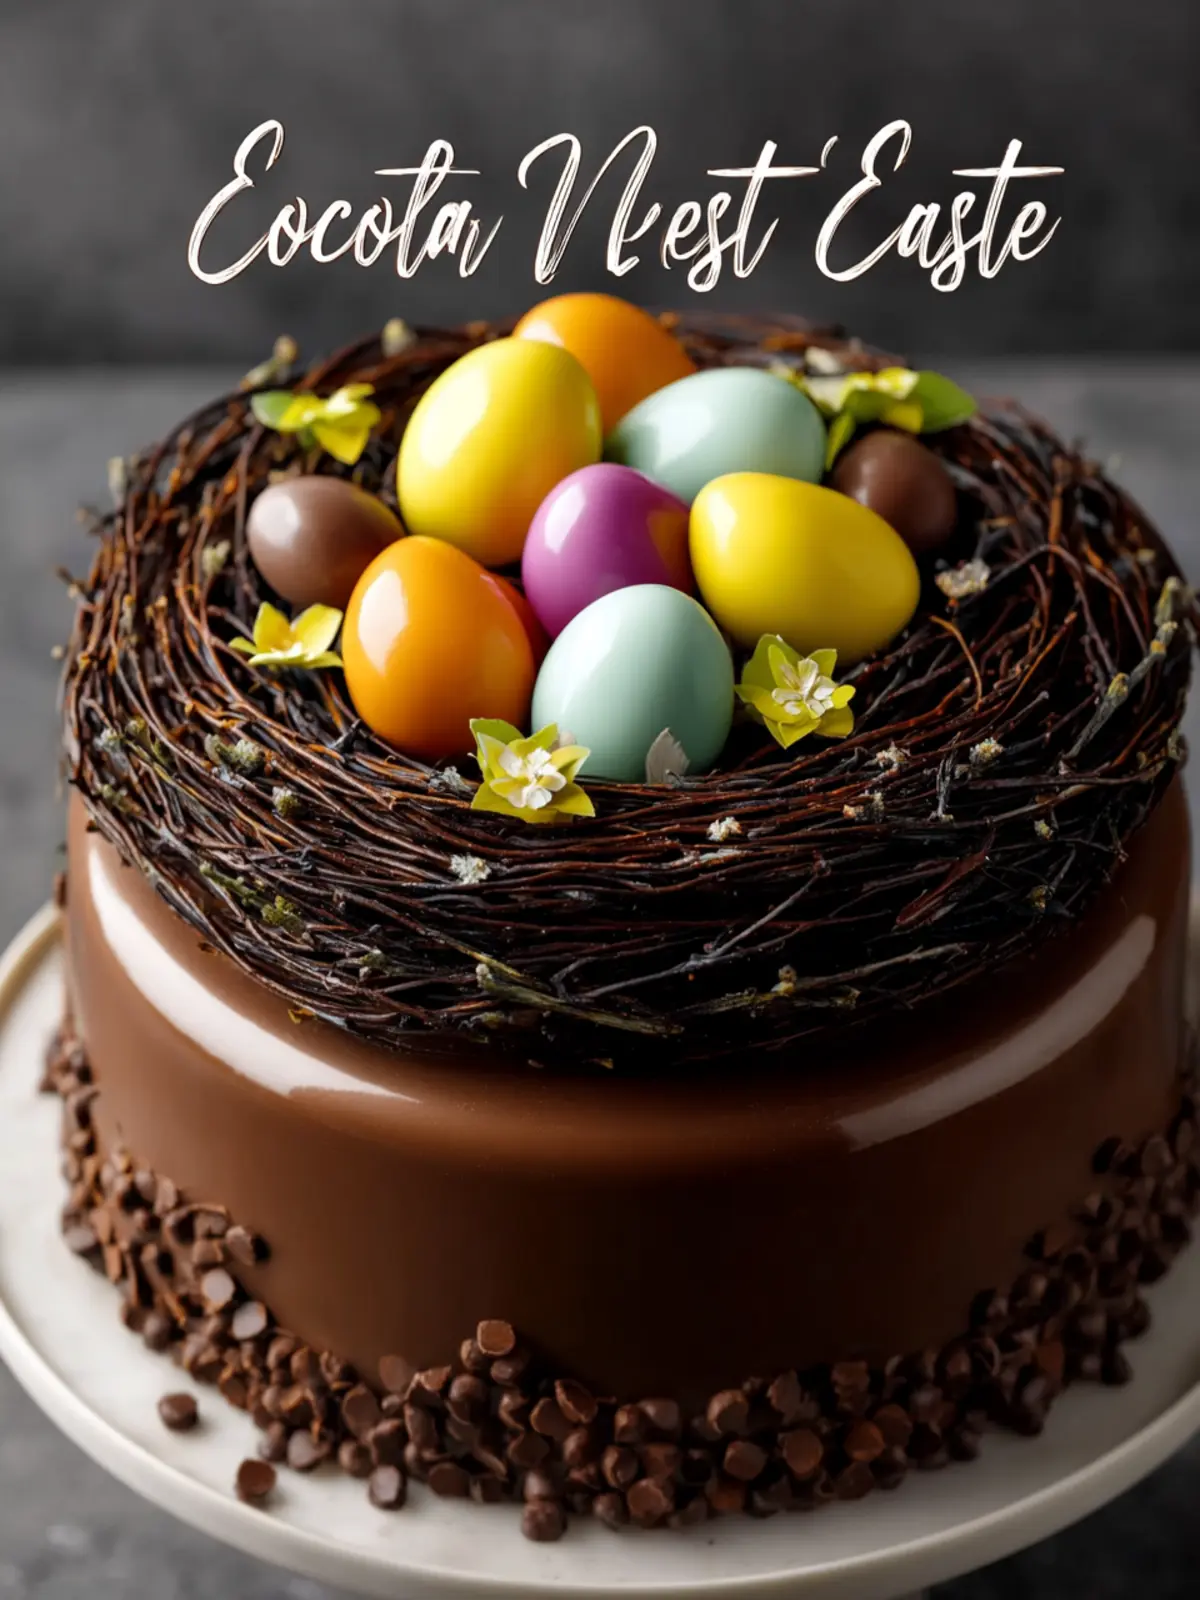
Chocolate Easter Egg Nest Cake: Irresistibly Fun and Tasty!
Introduction to Chocolate Easter Egg Nest Cake
Imagine the joy of creating a wonderful Chocolate Easter Egg Nest Cake, where every bite is a delightful celebration of flavors! This cake isn’t just a dessert; it’s a centerpiece that brings to life the spirit of Easter and the joy of gatherings. Picture a moist chocolate cake topped with a delightful swirl of chocolate ganache, cradling a fun and whimsical nest made from crispy chocolate nests, exuding sweetness and charm. It’s the perfect treat for young professionals looking to impress friends or colleagues during festive occasions.
What makes this cake a must-try for young professionals?
For those navigating the busy life of a young professional, this Chocolate Easter Egg Nest Cake stands out for several reasons:
-
Simple Yet Impressive: This cake is straightforward to make, yet it has that wow factor perfect for entertaining. Its aesthetic pleasure combined with rich chocolate flavor makes it a crowd-pleaser.
-
Time-Saving: With a preparation time that won’t steal your weekend, you can whip up this dessert after a long workday. The simplicity of the recipe allows you to focus less on the kitchen and more on celebrating with loved ones.
-
Perfect for Celebrations: Whether it’s an Easter brunch or a casual get-together, this cake embodies the spirit of festivity. Its playful appearance, enhanced by colorful chocolate eggs, makes it a delightful conversation starter among friends.
-
Customizable Touches: You can easily personalize your cake by using your favorite chocolate or even adding fruits or nuts according to your taste preference. This versatility makes the cake adaptable to any gathering.
Embrace the joy of baking with this Chocolate Easter Egg Nest Cake, and watch as it transforms an ordinary occasion into something special. Trust me, it’s an experience you wouldn’t want to miss!
Key Ingredients for Chocolate Easter Egg Nest Cake
Creating a delightful Chocolate Easter Egg Nest Cake is an adventure filled with sweet flavors and nostalgic memories. Let’s dive into the essential ingredients that will bring this charming cake to life.
-
Chocolate: The heart of our cake is high-quality dark chocolate. It provides a rich, deep flavor that contrasts beautifully with the sweetness of the frosting. Trust me, using premium chocolate makes a noticeable difference!
-
Butter: I use unsalted butter to achieve a rich and creamy texture. It not only enhances the cake’s moistness but also aids in creating that luscious frosting that everyone loves.
-
Sugar: Granulated sugar offers the sweetness we crave, while brown sugar adds a hint of caramel-like flavor. The combination ensures the cake is both tender and delicious.
-
Eggs: I find that using room-temperature eggs helps the cake to rise perfectly. They create that fluffy structure that keeps the cake moist and airy.
-
Flour: All-purpose flour is my go-to; it provides a solid foundation for the cake. If you need a gluten-free option, a 1:1 gluten-free flour blend works well too.
-
Baking Powder: This leavening agent is essential for that lovely rise, creating the light and airy texture we’re after.
-
Cocoa Powder: A key player in bringing out the rich chocolate flavor, cocoa powder gives our cake a deeper color and a more intense taste.
Each ingredient plays a crucial role in making your Chocolate Easter Egg Nest Cake not just a dessert, but a memorable experience. Enjoy your baking journey!
Why You’ll Love This Recipe
The combination of texture and flavor
The Chocolate Easter Egg Nest Cake is more than just a dessert; it’s a delightful experience that combines texture and flavor in a way that will have you coming back for seconds. Imagine sinking your fork into a moist, rich chocolate cake, complemented by the delightful crunch of a chocolate and cereal nest topping.
-
Moist Chocolate Cake: The cake itself is super moist, thanks to quality ingredients like butter and eggs. Each bite melts in your mouth, providing that deep chocolate fix we all crave.
-
Crunchy Nest Topping: The contrast of the crispy chocolate nests is simply irresistible. The combination of melted chocolate and crispy cereal creates a satisfying crunch that perfectly offsets the cake’s softness — it’s a texture lover’s dream!
-
Colorful Easter Eggs: Top it all off with colorful candy eggs, transforming the cake into a visual treat that looks just as good as it tastes. This beautiful presentation makes it perfect for Easter celebrations and family gatherings.
As you slice into this cake, you’ll experience a whimsical blend of flavors and textures that will not only satisfy your sweet tooth but also bring a smile to your face. Whether you’re enjoying it at a gathering or just treating yourself, this cake is sure to become a favorite in your recipe collection.
Variations of Chocolate Easter Egg Nest Cake
The Chocolate Easter Egg Nest Cake is not just a dessert; it’s an opportunity for creativity in the kitchen! Each bite can tell a different story, thanks to the scrumptious variations you can whip up. Let’s dive into some exciting flavor combinations and toppings that can elevate your cake experience.
Explore different flavor combinations and toppings
-
Nutty Delight: Consider folding in finely chopped nuts, like almonds or hazelnuts, into the chocolate batter. This adds a delightful crunch and richness to your chocolate easter egg nest cake.
-
Fruity Twist: Fresh fruits like raspberries or strawberries can add a vibrant flavor contrast. A layer of raspberry jam beneath the chocolate frosting might just become your new favorite combination.
-
Cookie Crumble: Why not incorporate crushed cookies, such as Oreos or graham crackers, for the “nest”? This will enhance the texture and add a fun surprise with every bite.
-
Decadent Drizzles: A drizzle of caramel or a rich chocolate ganache over the top can make your cake extra indulgent. It creates a beautiful visual effect and makes each serving that much more delightful.
-
Champagne Infusion: For a sophisticated twist, try adding a splash of champagne or Prosecco to the cake batter. This can give it a lightness that balances beautifully with the dense chocolate.
Embrace your inner baker and let your creativity shine through. The possibilities are endless with the Chocolate Easter Egg Nest Cake!
Cooking Tips and Notes for Chocolate Easter Egg Nest Cake
Baking a chocolate Easter egg nest cake is an delightful experience, especially when you see it come to life with your own hands. Here are some helpful tips to help you create a perfect cake that will impress your friends and family!
Get the best results and avoid common pitfalls
-
Choose high-quality chocolate: The flavor of your cake largely depends on the chocolate you use. Opt for good-quality dark or semi-sweet chocolate for a rich base that will elevate your cake’s taste.
-
Egg temperature matters: Make sure your eggs are at room temperature before mixing them into your batter. This helps achieve a smooth consistency and better aeration, giving you that perfect rise.
-
Do not overmix: When combining your wet and dry ingredients, mix gently until just combined. Overmixing can lead to a dense cake, which is not what we’re aiming for!
-
Let it cool completely: After baking, allow the cake to cool completely before frosting. A warm cake can melt your frosting, making it messy and less visually appealing.
-
Thick chocolate ganache: For the best texture in your ganache, let it sit until it thickens before pouring it over the cake. If it’s too runny, you won’t achieve that luscious finish.
-
Decorate with care: When adding the chocolate Easter eggs, arrange them gently in the nest to create an enticing centerpiece. A little creativity goes a long way!
By following these simple yet effective tips, you’ll not only create a stunning and delicious chocolate Easter egg nest cake, but you’ll also impress everyone around the table. Happy baking!
Serving Suggestions for Chocolate Easter Egg Nest Cake
Indulging in a Chocolate Easter Egg Nest Cake is more than just enjoying a slice; it’s about creating an experience that resonates with the fun and festive spirit of Easter. The visual presentation and accompanying flavors can elevate your cake from a simple dessert to a centerpiece worthy of any celebration.
Perfect Pairings and Presentation Ideas
-
Fresh Fruits: Pair your chocolate cake with vibrant berries, such as strawberries and raspberries. Their tartness contrasts beautifully with the rich chocolate, while adding a pop of color that makes the dessert visually appealing.
-
Whipped Cream: A dollop of freshly whipped cream can add a light and airy texture. Consider infusing it with vanilla extract or even a hint of almond to complement the chocolate flavor.
-
Decorative Touches: To truly embrace that Easter theme, scatter some mini chocolate eggs around the base of the cake. For an elegant touch, use edible flowers like pansies or violets that mirror the spirit of spring.
-
Themed Plates: Serve your Chocolate Easter Egg Nest Cake on cheerful, pastel-colored plates that reflect the joy of the occasion. This simple change can enhance the overall aesthetic and create a festive atmosphere.
These ideas don’t just provide a beautiful presentation but also enrich the flavor and enjoyment of your Chocolate Easter Egg Nest Cake, making every bite even more memorable.
Time Breakdown for Chocolate Easter Egg Nest Cake
Creating a delightful Chocolate Easter Egg Nest Cake is a charming experience, and understanding the time required can help you plan your baking adventure better. Here’s a quick breakdown so you can whip up this festive cake with ease.
Preparation time
Start your baking journey with about 20 minutes of preparation. During this time, you’ll gather your ingredients, mix the batter, and prepare the cake tins for baking.
Baking time
Once you’ve prepped everything, the baking process will take approximately 30 minutes. Keep an eye on the oven, as you’ll want to achieve that perfect springy texture.
Cooling time
After baking, allow the cake to cool for 15 to 20 minutes. This step is crucial for ensuring that your Chocolate Easter Egg Nest Cake holds its shape when you position it for decorating.
Total time
In total, plan for about an hour from start to finish. This includes preparation, baking, and cooling, making it a manageable and enjoyable baking experience for any chocolate lover.
Nutritional Facts for Chocolate Easter Egg Nest Cake
Creating a delightful Chocolate Easter Egg Nest Cake isn’t just about the taste; it’s also important to know what’s going into this delicious treat. Below are the nutritional facts to help you indulge wisely.
Calories
Each slice of this cake is approximately 350 calories. This is a satisfying number for a sweet dessert, especially during festive celebrations.
Sugar Content
With the rich chocolate, cream, and sweet toppings, this cake contains around 30 grams of sugar per slice. While it’s definitely a treat, it’s good to enjoy in moderation!
Fat Content
The cake boasts about 18 grams of fat per slice, primarily from butter and the chocolate. This creamy richness is what makes each bite so pleasurable, but balance it with other meals throughout your day.
Whether it’s for a festive gathering or a special family moment, knowing these nutritional facts empowers you to enjoy your Chocolate Easter Egg Nest Cake mindfully.
FAQs about Chocolate Easter Egg Nest Cake
Can I use substitutions for any of the ingredients?
When it comes to the Chocolate Easter Egg Nest Cake, you might find yourself in a pinch for a few ingredients. Don’t worry! Here are some friendly substitutions:
- Chocolate: Use dark, milk, or even white chocolate depending on your taste. Cocoa powder is a great alternative if you’re short on solid chocolate.
- Butter: If you’re looking for a vegan option, coconut oil or a plant-based butter alternative will work perfectly.
- Sugar: You can substitute granulated sugar with coconut sugar or maple syrup; just adjust the liquid content in the recipe.
- Eggs: For a vegan version, consider using flax eggs or unsweetened applesauce—both offer great binding properties.
How do I store the cake properly?
To keep your Chocolate Easter Egg Nest Cake fresh and delicious, wrap it in plastic wrap or place it in an airtight container. It can be stored at room temperature for up to three days. If you want to enjoy it longer, refrigerate it, and it will last up to a week. Just be sure to let it come to room temperature before serving for that melt-in-your-mouth experience!
What occasion is this cake best for?
This delightful Chocolate Easter Egg Nest Cake is not just for Easter! Its rich chocolate flavor and whimsical nest decorations make it a fantastic centerpiece for any celebration—be it birthdays, family gatherings, or even a cozy dinner party. Just imagine the smiles when you present this show-stopper at your next memorable event!
Conclusion on Chocolate Easter Egg Nest Cake
Creating a chocolate Easter egg nest cake is more than just a baking project; it’s a cherished opportunity to connect with friends and family. As you layer the rich chocolate goodness, watch the joy on your loved ones’ faces when they see the delightful nest topped with colorful Easter eggs.
- Delight in the Process: The experience of measuring, mixing, and decorating becomes a cherished memory, especially during festive gatherings.
- Perfect for Sharing: This cake sparks conversations and laughter, making it a centerpiece of any celebration.
Embrace the joy of making and sharing this unique treat—it’s sure to become a beloved tradition!
Print
Chocolate Cake with Ganache and Nest
- Total Time: 1 hour 10 minutes
- Yield: 12 servings 1x
- Diet: Vegetarian
Description
Indulge in this rich and moist chocolate cake topped with smooth ganache and a decorative chocolate nest filled with mini eggs!
Ingredients
Scale
- 1 ¾ cups all-purpose flour
- ¾ cup unsweetened cocoa powder
- 2 cups granulated sugar
- 2 teaspoons baking powder
- 1 teaspoon baking soda
- ½ teaspoon salt
- 1 cup buttermilk
- ½ cup vegetable oil
- 2 large eggs
- 2 teaspoons vanilla extract
- 1 cup hot water or coffee
- 1 cup heavy cream
- 8 oz dark chocolate, chopped
- 1 tablespoon unsalted butter
- 6 oz dark chocolate, melted
- Parchment paper
- Mini chocolate eggs or candy-coated Easter eggs
Instructions
-
Preheat the oven to 350°F (175°C). Grease and line a 9-inch round cake pan that is at least 2 inches deep with parchment paper.
-
In a large mixing bowl, whisk together the flour, cocoa powder, sugar, baking powder, baking soda, and salt.
-
Add the buttermilk, vegetable oil, eggs, and vanilla extract, then mix until well combined.
-
Slowly stir in the hot water or coffee until fully incorporated; the batter will be thin.
-
Pour the batter into the prepared pan and bake for 30-35 minutes, or until a toothpick inserted in the center comes out clean.
-
Let the cake cool in the pan for 10 minutes, then transfer it to a wire rack to cool completely.
-
In a saucepan, heat the heavy cream over medium heat until it starts to simmer, but do not let it boil.
-
Remove from heat and pour over the chopped dark chocolate. Let it sit for 2-3 minutes, then stir until smooth. Add the butter and stir until fully incorporated. Let the ganache cool slightly until it thickens but remains pourable.
-
Melt the dark chocolate in a microwave-safe bowl using 30-second intervals, stirring between each, until smooth.
-
Transfer the melted chocolate to a piping bag or a small ziplock bag with the corner snipped off. Lay a sheet of parchment paper on a baking tray, then pipe the chocolate in crisscrossing strands to form a circular nest shape. Place the tray in the refrigerator for 15-20 minutes, or until the chocolate nest is firm.
-
Place the cooled cake on a serving platter. Pour the chocolate ganache over the cake, letting it drip down the sides.
-
Carefully peel the chocolate nest from the parchment paper and place it on top of the cake. Fill the nest with mini chocolate eggs before serving.
Notes
- This cake is perfect for celebrations and special occasions.
- Ensure to use high-quality chocolate for the ganache and the nest for best flavor.
- Let the cake cool completely before adding ganache to avoid melting it.
- Prep Time: 20 minutes
- Cook Time: 35 minutes
- Category: Dessert
- Method: Baking
- Cuisine: American
Nutrition
- Serving Size: 1 slice
- Calories: 450
- Sugar: 35g
- Sodium: 300mg
- Fat: 23g
- Saturated Fat: 10g
- Unsaturated Fat: 10g
- Trans Fat: 0g
- Carbohydrates: 54g
- Fiber: 3g
- Protein: 5g
- Cholesterol: 60mg