Follow Me On Social Media!


St. Joseph’s Day Pastry: Indulgent Sweet Treat to Savor
Introduction to St. Joseph’s Day Pastry
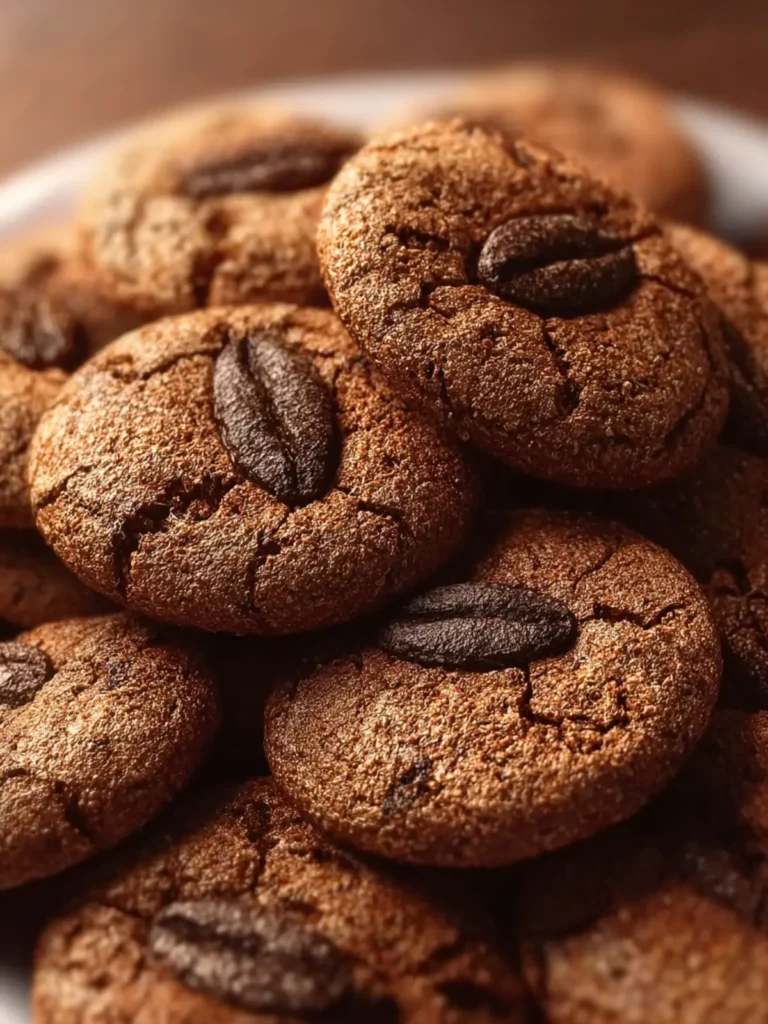
Every March 19th, families gather to celebrate St. Joseph’s Day, a day filled with tradition, gratitude, and the delightful taste of St. Joseph’s Day Pastry. This pastry is more than just a treat; it’s a cherished symbol of love and devotion, commemorating St. Joseph, the earthly father of Jesus and the patron saint of workers and families. In Italian culture, it’s customary to honor St. Joseph with a table full of delectable foods, and this custard-filled pastry takes center stage.
What is St. Joseph’s Day, and why is this pastry special?
St. Joseph’s Day is celebrated by many around the world, particularly among those of Italian descent. It coincides with the feast of the patron saint, offering a chance for communities to come together in appreciation for the blessings in their lives. The pastries baked for this day are typically sweet, filled with creamy custard, and topped with powdered sugar, symbolizing the joy and gratitude the day embodies.
What makes the St. Joseph’s Day Pastry truly special is its rich history and the care that goes into making each batch. Many families have their own recipes passed down through generations, each with its unique twist. For some, the dough is light and airy; for others, it might have a more robust flavor. Regardless, the common thread is the passion involved in crafting these delightful treats.
Imagine walking into a warm kitchen filled with the scent of baking pastry and sweet vanilla custard. The soft, flaky crust gives way to a velvety filling, each bite offering a moment of nostalgia and joy. As you enjoy this pastry, you’re not just tasting a dessert; you’re savoring a piece of history, a blend of tradition and family values celebrated year after year.
So, whether you’re gathering with loved ones or making it for yourself, this St. Joseph’s Day Pastry will surely bring the sweetness of tradition into your life.

Key Ingredients for St. Joseph’s Day Pastry
St. Joseph’s Day Pastry is not just a dessert; it’s a beloved tradition rich in history and flavor. Every ingredient plays a pivotal role in creating this masterpiece that celebrates the spirit of the day, and I’ve discovered a few essentials that can elevate your pastry game.
-
Dough: A light and flaky dough is the foundation of any great pastry. I prefer a homemade version that balances butter and flour to achieve the perfect crispness. If you’re short on time, store-bought puff pastry can also do the trick!
-
Ricotta Cheese: This creamy cheese lends a delightful richness to the filling. Make sure to choose whole milk ricotta for the best texture and flavor. For a uniquely Italian touch, try mixing in some citrus zest.
-
Sugar: Granulated sugar sweetens the filling, while powdered sugar is perfect for dusting on top after baking. The combination adds a nice contrast to the rich flavors.
-
Vanilla and Cinnamon: These spices infuse warmth into the filling. A splash of vanilla extract alongside a pinch of cinnamon not only enhances the taste but also recalls the comforting scents of home.
-
Eggs: Incorporating eggs in the filling helps bind everything together, ensuring a smooth and creamy consistency. Beaten egg yolks add richness, while the whites can create a nice airy texture when whipped.
These ingredients together create a harmonious blend that celebrates St. Joseph’s Day in every bite. Happy baking!
Why You’ll Love This St. Joseph’s Day Pastry
Imagine gathering on a sunny afternoon, the air sweet with the smell of freshly baked St. Joseph’s Day Pastry. This traditional Italian treat not only celebrates St. Joseph’s feast day but also brings together family and friends around the kitchen table. Each bite of this delightful pastry is a reminder of warm memories, laughter, and the joy of sharing.
A Burst of Flavor in Every Bite
One of the reasons you’ll find yourself falling for this St. Joseph’s Day Pastry is its rich, flavorful filling. Made with creamy ricotta cheese, sweet candied fruits, and a hint of citrus, the blend transports you to a cozy Italian kitchen. The contrasting textures of the crisp pastry and smooth filling make for an irresistible combination.
Nostalgic Family Traditions
For many, preparing this pastry is a cherished family ritual. Perhaps you have fond memories of your grandmother rolling out dough or mixing the filling. Each bite can evoke those cherished moments, making it not just a dessert but a piece of your heritage.
Simple Yet Rewarding
What’s truly exceptional about this pastry is its simplicity. With basic ingredients, it’s an accessible treat that anyone can master. You’ll find joy not just in the eating but in the making, transforming your kitchen into a hub of creativity and deliciousness as you create this beloved St. Joseph’s Day Pastry.

Tips for Making Perfect St. Joseph’s Day Pastry
Creating a delightful St. Joseph’s Day Pastry is not just about following a recipe; it’s about embracing the tradition and sharing it with those you love. Here are some valuable tips to help you achieve pastry perfection.
Choose Quality Ingredients
Your St. Joseph’s Day Pastry deserves the best! Opt for high-quality butter, flour, and fresh ricotta. The richness of good ingredients elevates the flavor and texture significantly.
Master the Dough
Achieving the right dough consistency is crucial. Ensure your butter is cold when mixing it into the flour to create flakiness. Don’t be afraid to let it rest! Chilling the dough helps to prevent shrinkage during baking.
Mind the Filling
When preparing your filling, be sure to taste as you go. Adding just the right amount of sugar and spices ensures a well-balanced filling that complements the pastry perfectly.
Bake with Care
To get that golden-brown finish, preheat your oven completely before placing the pastries inside. This ensures even baking and helps them rise beautifully. Keep an eye on them towards the end to avoid over-browning.
Presentation Matters
Don’t forget to dust your St. Joseph’s Day Pastry with powdered sugar for that beautiful finishing touch. A sprinkle enhances its visual appeal and adds a touch of sweetness.
Enjoy the process, and remember, practice makes perfect!
Time Details for St. Joseph’s Day Pastry
Cooking a St. Joseph’s Day Pastry can be a delightful experience, as you celebrate tradition with every bite. Understanding the timing involved can make your baking journey smoother and more enjoyable.
Preparation Time
To get started on your St. Joseph’s Day Pastry, you’ll need about 30 minutes for preparation. This includes gathering your ingredients and carefully making the pastry dough, ensuring that you take the time to craft each detail just right.
Baking Time
Once your pastries are assembled, they’ll require around 25-30 minutes in the oven. Keep an eye on them as they bake; you want a beautiful golden color to bring out the best flavors.
Total Time
From start to finish, expect to spend roughly 1 hour to 1 hour and 5 minutes making your St. Joseph’s Day Pastry. This time well spent will reward you with a delicious treat that brings smiles to the table!
Nutritional Information for St. Joseph’s Day Pastry
Celebrating St. Joseph’s Day with a delightful pastry not only honors the tradition but also satisfies your sweet tooth. Here’s a quick look at the nutritional profile, helping you enjoy this treat with a bit of mindfulness.
Calories
A slice of St. Joseph’s Day Pastry packs around 300 calories. While it’s a delightful dessert, savoring it in moderation is key to enjoying its rich flavors without overindulging.
Protein
With approximately 6 grams of protein per serving, this pastry offers a modest boost. The inclusion of eggs contributes to this protein count, making it a bit more satisfying than regular sweets.
Sodium
One slice of St. Joseph’s Day Pastry contains about 150 milligrams of sodium. This is relatively low, but it’s always smart to pair sweets with plenty of fresh fruits or nuts to keep your overall meal balanced.
Enjoy your pastry mindfully, knowing you can appreciate both its flavor and nutritional value!
FAQs about St. Joseph’s Day Pastry
St. Joseph’s Day Pastry is not just a treat; it’s a cherished tradition that brings friends and families together each March. Understanding some common questions can help elevate your baking experience and ensure you create the perfect pastry. Here are some frequently asked questions:
Can I make the pastry dough ahead of time?
Absolutely! Preparing the dough ahead of time can save you a lot of hassle on the day you plan to serve your St. Joseph’s Day Pastry. Simply wrap the dough tightly in plastic wrap and store it in the refrigerator for up to 24 hours. When you’re ready to use it, bring it to room temperature before rolling it out. This extra step can enhance the flavors and make for an easier rolling experience.
How do I store the St. Joseph’s Day Pastries?
The beauty of St. Joseph’s Day Pastries lies in their delightful texture; to maintain that, it’s crucial to store them properly. After baking, let the pastries cool completely before placing them in an airtight container. They can generally be stored at room temperature for 1-2 days. If you need to keep them longer, refrigeration is a solid option, but make sure to enjoy them within a week for the best taste.
Can I substitute ingredients for allergy concerns?
Certainly! Adjusting the St. Joseph’s Day Pastry ingredients for allergies or dietary preferences is possible. Here are some adaptations:
- Gluten-Free Flour: Substitute with a 1:1 gluten-free baking blend to make the pastry gluten-free.
- Dairy-Free Butter: Use a plant-based butter in place of regular butter for a dairy-free option.
- Egg Alternatives: If you’re avoiding eggs, consider using flaxseed meal mixed with water or a commercial egg replacer.
Feel free to personalize this cherished recipe; the spirit of St. Joseph’s Day Pastry is all about bringing joy to your table!
Conclusion on St. Joseph’s Day Pastry
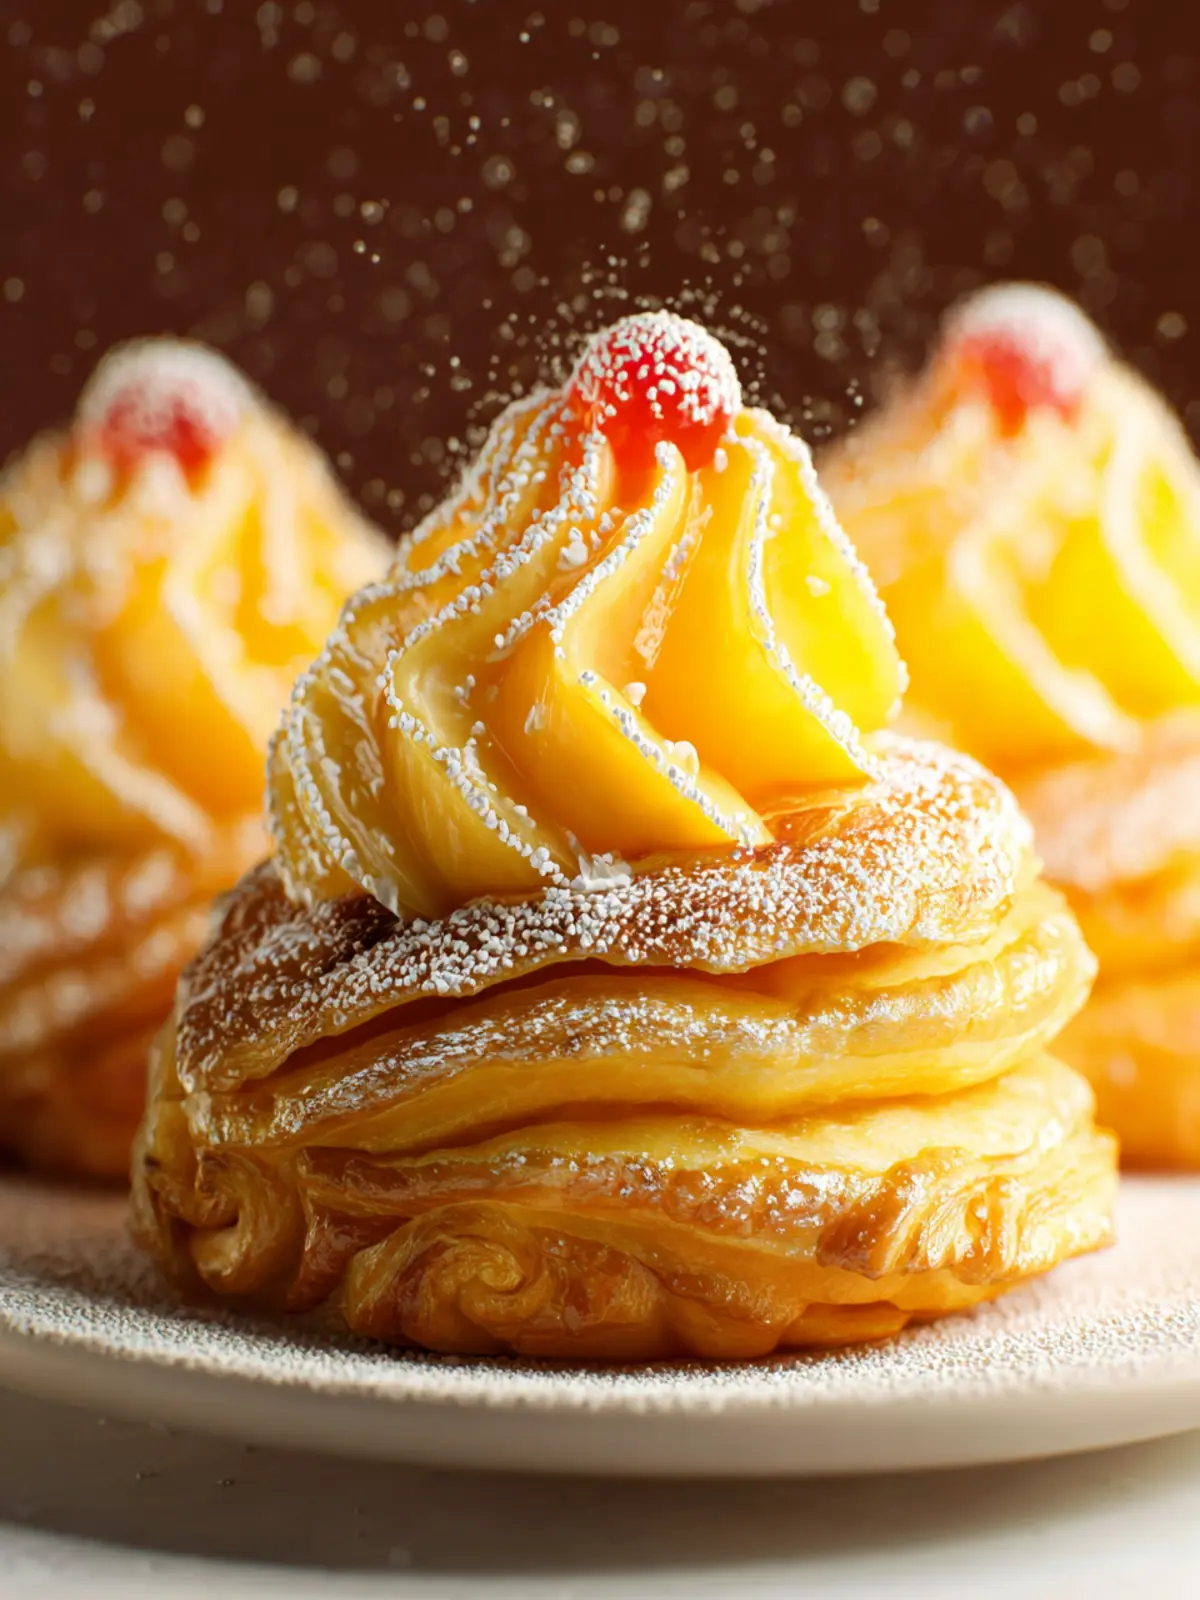
In embracing the tradition of St. Joseph’s Day Pastry, you’re not just crafting a delicious treat; you’re connecting with a rich cultural heritage and sharing something truly special with those around you. The delicate layers of dough, sweet ricotta filling, and touch of powdered sugar evoke a sense of warmth and togetherness that can only come from family recipes passed down through generations. As you gather with friends and loved ones to enjoy this delightful pastry, take a moment to savor not only the flavors but also the stories and memories they represent. Happy baking!
Print
Choux Pastry Cream Puffs
- Total Time: 45 minutes
- Yield: 24 puffs 1x
- Diet: Vegetarian
Description
Delicious homemade choux pastry filled with a creamy custard and topped with powdered sugar and cherries.
Ingredients
Scale
- 1 1/4 cup water
- 1 2/3 cup all purpose flour
- 1/2 cup salted butter, softened
- 4 large eggs
- 1/2 tsp salt
- 2 2/3 cups whole milk
- 6 large egg yolks
- 1/2 cup granulated white sugar
- 1/2 cup corn starch
- 1/2 cup salted butter
- 1 tbsp vanilla extract
- 1/4 cup powdered sugar
- 12 maraschino cherries or compote cherries
Instructions
- First, in a medium sized pot on the stove on high heat, add butter and melt it. Immediately add the water (1 1/4 cups) and salt (1/2 tsp). As soon as it comes to a boil, reduce heat to low and add all of the flour. Stir until it becomes thick and malleable and then turn off heat.
- Next, place it into a large mixing bowl and allow it to cool for 5 minutes. Then, mix the dough for about a minute.
- Important: Add eggs only ONE AT A TIME after each has been combined into the dough. The dough should be smooth after the last egg.
- Then, add parchment paper or silicone mats to two large baking sheets.
- Preheat oven to 400F.
- Then, put the dough into a pastry bag with a large star tip (optional) and begin piping the dough in round circles about two inches apart on the baking sheets. You can pipe one layer to use each as a top and a bottom, or you can pipe two layers on each to make them taller and then cut them in half when they’re cool to fill with custard. The latter option will make larger pastries than the former.
- Next, bake them until they get a brown coating on top which will be about 25 minutes and then add 3-4 more minutes. They need to be lightly browned on top before you remove them. Do not remove them beforehand. My suggestion is to do one baking sheet at a time because the bottom rack may not brown as quickly as the top if you bake them at the same time. Let them cool.
- First, in a large mixing bowl, add egg yolks, vanilla extract, and sugar and mix. Add the corn starch and half of the milk. Mix until smooth.
- Then, in a medium-sized pot (non-stick preferably), add the remaining two cups of milk and 1/2 cup of butter. Heat it but, don’t bring it to a boil. Turn the heat to low and begin adding the egg mixture. Stir quickly to combine and keep stirring it constantly until it thickens. Scrape the bottom when it starts sticking. Do not overcook or it’ll burn. Remove from heat and cover and allow it to cool until ready to use.
- First, place the pastry cream into a piping bag with the star tip but, it isn’t necessary to use the pastry bag and star tip. You may also just spoon the cooked pastry dough into a gallon-sized plastic zipper bag and cut the corner one inch as a substitute piping bag and not use the star tip.
- Once the cooked pastry dough is cool, cut them in half. If you ended up with flat pastry, you may also use them and just pipe the cream on top of half of them and top them with the other half.
- Then, put a one inch dollop of cream on the top, in the middle as shown on each.
- Next, sprinkle with powdered sugar or do it just before serving.
- Then, top with a cherry on the dollop of cream. Cover with plastic wrap and refrigerate until ready to serve.
Notes
- You can pipe one layer to use each as a top and a bottom or pipe two layers for taller pastries.
- Ensure the pastry is lightly browned for the best texture.
- Prep Time: 15 minutes
- Cook Time: 30 minutes
- Category: Dessert
- Method: Baking
- Cuisine: French